
Paint correction is one of the most rewarding stages in professional car detailing. It transforms a dull, swirled, or scratched paint surface into a flawless, mirror-like finish. For beginners, the term might sound intimidating, but with the right knowledge, tools, and patience, even a novice can learn to restore and enhance a vehicle’s paintwork effectively. The process involves carefully removing imperfections such as swirl marks, oxidation, holograms, water spots, and light scratches through the controlled use of polishing machines, pads, and compounds.
Every car’s paint tells a story. Over time, exposure to harsh sunlight, poor washing techniques, and environmental contaminants degrade the surface. Paint correction reverses these effects by levelling the clear coat, allowing the true depth and gloss of the colour to shine through once again. Unlike waxing or polishing, which only temporarily mask defects, paint correction permanently removes them, restoring clarity and brilliance.
Understanding the principles behind paint correction is essential for achieving professional results. This guide will walk you through the basics—what it is, why it’s needed, the tools involved, and how to perform it safely and effectively. Whether you’re an enthusiast looking to improve your car’s appearance or an aspiring detailer aiming to expand your skills, this guide provides the foundation for mastering the art of paint correction.
What Is Paint Correction?
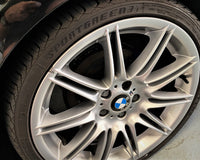
Paint correction is the meticulous process of removing a fine layer of the vehicle’s clear coat to eliminate surface imperfections. These imperfections—such as swirl marks, scratches, water spots, and oxidation—scatter light unevenly, making the paint look faded or hazy. By gently polishing the surface, you level out the clear coat so light reflects evenly, creating that deep, reflective gloss associated with showroom finishes.
It’s important to understand that paint correction doesn’t add anything to the paint—it refines what’s already there by removing microscopic layers of damaged material. Depending on the condition of the paint, correction can range from a light polish to a multi-stage process involving different compounds and pads.
In most cases, paint correction is followed by the application of a protective layer, such as a wax, sealant, or ceramic coating, to maintain the refined finish and prevent future damage. This final protection locks in the gloss and makes maintenance easier.
Why Paint Correction Is Important
Even with regular washing, most vehicles accumulate surface defects over time. Automated car washes, improper drying, and environmental factors like UV rays and acid rain all contribute to paint degradation. Over months or years, these factors create a network of fine scratches and swirl marks that dull the finish.
Paint correction restores the vehicle’s original shine, making the colour appear richer and more vibrant. For enthusiasts, it’s one of the most satisfying transformations in detailing. For professionals, it’s a service that adds significant value to any detailing package. A properly corrected paint surface also enhances the effectiveness of protective coatings, ensuring they bond better and last longer.
Beyond aesthetics, paint correction also plays a role in preserving the value of the car. A well-maintained exterior reflects care and attention to detail, which can influence resale appeal. For anyone serious about maintaining or restoring their vehicle, paint correction is a cornerstone of proper detailing.

Understanding Paint Defects
Before performing paint correction, it’s crucial to identify the types of imperfections present. Each defect requires a specific approach, and understanding the cause helps determine the correct method to fix it. Common paint defects include:
-
Swirl Marks: These fine circular scratches are often caused by improper washing or drying techniques, such as using dirty sponges or towels.
-
Light Scratches: These may result from contact with tree branches, zips, or abrasive cleaning materials.
-
Oxidation: Prolonged exposure to sunlight and oxygen leads to faded, chalky paint.
-
Water Spots: Caused by mineral deposits left after water evaporates on the surface.
-
Etching: Bird droppings, bug splatter, or acid rain can chemically eat into the paint if not cleaned promptly.
-
Holograms: Machine polishing done incorrectly can leave visible buffer trails that distort reflections.
Identifying these imperfections under proper lighting—such as LED or halogen lights—is essential for planning your correction stages.
Essential Tools and Products for Paint Correction
Having the right equipment and products makes a massive difference in achieving quality results. Here’s what every beginner should have:
1. Dual Action (DA) Polisher
A DA polisher is ideal for beginners because it oscillates as well as rotates, reducing the risk of damaging the paint. It’s more forgiving than a rotary polisher while still offering enough correction power for most vehicles.
2. Polishing Pads
Pads come in different materials and levels of aggressiveness—cutting, polishing, and finishing. Foam pads are the most common for beginners due to their versatility and control. Microfibre and wool pads offer more cutting power but require more experience.
3. Compounds and Polishes
-
Compounds are abrasive products used to remove deeper scratches or heavy oxidation.
-
Polishes have finer abrasives, ideal for refining the surface and enhancing gloss after compounding.
-
Always match the compound and polish to the condition of the paint and pad you’re using.
4. Paint Thickness Gauge
This tool helps measure the clear coat depth to ensure you don’t remove too much material during correction. It’s a critical safety step for professionals and cautious enthusiasts alike.
5. Microfibre Towels
High-quality, clean microfibre towels are essential for removing polish residue and inspecting your progress. Avoid using old or contaminated towels to prevent reintroducing scratches.
6. Proper Lighting
Inspection lighting is vital. Use LED spotlights or handheld detailing lamps to reveal imperfections and evaluate results as you work.
The Paint Correction Process Step-by-Step
Step 1: Wash and Decontaminate
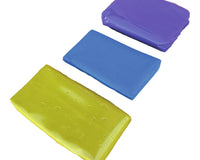
Start with a thorough wash using the two-bucket method to remove surface dirt and grime. After washing, use a clay bar or clay mitt with a lubricant to remove bonded contaminants such as tar, iron filings, or tree sap. This ensures a clean, smooth surface ready for correction.
Step 2: Inspect and Test Spot
Inspect the paint under proper lighting and choose a small section to test your product and pad combination. This test spot helps determine the minimum level of aggressiveness needed to achieve your desired result without removing excessive clear coat.
Step 3: Begin Polishing
Apply a small amount of compound to the pad, spread it on the surface, and start polishing at low speed to distribute the product evenly. Gradually increase the speed, allowing the DA polisher to work the abrasives effectively. Keep the pad flat against the surface and use consistent, overlapping passes.
After completing a section, wipe off residue with a clean microfibre towel and inspect the results under your light source. If defects remain, you may need to repeat the process or move to a slightly more aggressive combination.
Step 4: Refine with a Finishing Polish
Once defects are removed, switch to a softer pad and a finer polish. This step refines the finish, enhances clarity, and maximises gloss. It’s what gives the paint that deep, mirror-like reflection.
Step 5: Protect the Finish
After polishing, the paint is bare and needs protection. Apply a high-quality wax, sealant, or ceramic coating to lock in the results. This protective layer shields the paint from UV rays, water spots, and light scratches, preserving your work for months or even years.
Common Mistakes to Avoid
-
Skipping Decontamination: Polishing over contaminants can cause micro-scratches.
-
Using Too Much Pressure: Let the machine and abrasives do the work—excess pressure can create holograms or burn the paint.
-
Not Cleaning Pads Frequently: Dirty pads lose efficiency and can introduce new scratches.
-
Ignoring Panel Temperatures: Overheating can damage paint. Always allow panels to cool between passes.
-
Polishing Without Measuring Thickness: Over-polishing can thin the clear coat dangerously.
Being patient and methodical is key. Paint correction is about precision, not speed.
How Long Does Paint Correction Last?
The longevity of your paint correction depends largely on maintenance. Regular washing with the two-bucket method, avoiding automatic car washes, and using pH-balanced shampoos can help preserve the corrected surface. Applying a ceramic coating or wax further extends protection, keeping the finish pristine for years rather than months.
Proper washing techniques and periodic inspections ensure you won’t need frequent corrections. Over-correcting can thin the clear coat, so it’s better to maintain the finish than repeatedly polish it.
Conclusion: Mastering the Art of Gloss
Paint correction is one of the most satisfying detailing skills to learn, offering dramatic visual improvements and long-lasting results. It’s a blend of science, patience, and artistry—understanding how abrasives, pads, and paint systems interact is what separates a good finish from a flawless one.
For beginners, starting with a dual action polisher, quality products, and proper technique lays the foundation for professional-level results. With practice, you’ll gain confidence and precision, learning how to bring out the best in every vehicle’s paintwork.
Ultimately, paint correction is more than a process—it’s a transformation. It revives not only the car’s appearance but also the pride of ownership that comes with a perfectly polished finish.