
If you have ever washed your car and still felt that the paint is not completely smooth, you are not alone. A standard wash removes surface dirt, but it does not deal with the stubborn contaminants that bond to the paint over time. This is where a proper DIY car decontamination process becomes essential. It is one of the most important yet underrated parts of car detailing, especially if you want that deep gloss and silky finish.
Many car owners skip this step simply because they are unaware of how much contamination builds up on their vehicle. Things like brake dust, tar, industrial fallout, and environmental residue slowly embed into the clear coat. These contaminants not only affect the look of your car but can also damage the paint if left untreated. A proper decontamination routine will completely transform how your car looks and feels.
In this guide, you will learn a simple and effective step by step car decontamination process that you can carry out at home. It follows the same principles used by professional detailers but is easy enough for anyone to follow.
Understanding Car Decontamination
Before getting started, it is important to understand what car decontamination actually involves. Even after a thorough wash, your car’s surface still holds invisible contaminants that shampoo alone cannot remove. These particles stick to the paint and create a rough texture, which you can feel when you run your hand across the surface.
Over time, these contaminants dull the finish and prevent wax or sealants from bonding properly. This means your protection layers will not last as long or perform as well. In some cases, embedded iron particles can even cause small rust spots, which can become a serious issue if ignored.
A proper car decontamination process removes all of these impurities. It restores smoothness, improves shine, and prepares the paint for further detailing steps like polishing or ceramic coating.
Products You Will Need
To carry out a proper DIY car decontamination, you need the right set of tools and products. Using correct detailing supplies makes a huge difference in both safety and results. You do not need anything overly complicated, but quality does matter.
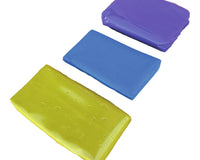
Start with a good pH neutral car shampoo and a pre wash solution such as snow foam. You will also need a tar remover and an iron fallout remover to tackle different types of contamination. For the physical stage, a clay bar or clay mitt is essential.
Alongside these, make sure you have microfibre wash mitts, drying towels, and two buckets with grit guards. Having access to clean water and working in a shaded area will also help you achieve better results without risking damage.
Pre Wash Stage
The pre wash stage is where the process truly begins. This step removes loose dirt and grime before you touch the paint. It may seem simple, but it plays a crucial role in preventing scratches during the wash.
Apply a snow foam or pre wash solution evenly across the car. Let it sit for a few minutes so it can break down dirt, road film, and other surface contaminants. You will notice the foam slowly lifting dirt away from the paint as it runs down.
Once the product has had enough time to work, rinse the car thoroughly. This step alone removes a surprising amount of contamination and sets the foundation for a safer wash.
Contact Wash Method
After the pre wash, move on to a proper contact wash using the two bucket method. This technique helps reduce the risk of swirl marks by keeping dirty water separate from your clean shampoo.
Use a soft microfibre wash mitt and start from the top of the car, working your way down. Rinse the mitt regularly in the clean water bucket before dipping it back into the shampoo. This ensures that dirt is not being rubbed back onto the paint.

Take your time during this stage and do not rush. A careful wash ensures that the surface is clean enough for the chemical decontamination steps that follow.
Removing Tar Spots
Tar spots are one of the most stubborn types of contamination you will find on a car. They usually appear as small black dots on lower panels and behind the wheels. These cannot be removed by washing alone.
Apply a dedicated tar remover to the affected areas and allow it to dwell for a few minutes. You will often see the tar begin to dissolve and run down the surface. It is important to let the product do the work instead of scrubbing aggressively.
Once the tar has broken down, rinse the area thoroughly. This step removes a significant portion of bonded contaminants and improves the overall cleanliness of the paint.
Iron Fallout Treatment
Iron contamination is another major issue that affects car paint. Tiny metal particles from brake dust and the environment embed themselves into the surface and can lead to long term damage if not removed.
Spray an iron fallout remover across the vehicle, especially on areas that are more exposed such as wheels and lower panels. As the product reacts with iron particles, it will change colour, usually turning purple or red.
Allow the product to work for the recommended time, then rinse it off completely. This stage is extremely satisfying and makes a noticeable difference in the condition of your paint.
Clay Bar Process
The final stage of decontamination involves using a clay bar or clay mitt. This step physically removes any remaining bonded contaminants that chemical products could not eliminate.
Use a proper lubricant and gently glide the clay across the surface. You will feel slight resistance at first, which gradually disappears as the paint becomes smoother. Always keep the surface well lubricated to avoid scratching.
Continue this process panel by panel until the entire car feels smooth. This is the step that truly refines the surface and prepares it for polishing or protection.
Final Rinse and Drying
Once all decontamination steps are complete, give the car a final rinse to remove any leftover residue. Pay attention to areas where water and chemicals can collect, such as trims and panel gaps.
Dry the car using a clean microfibre towel. Use gentle movements to avoid introducing any marks. A proper drying technique helps maintain the finish you have just achieved.
At this point, your car is fully decontaminated and ready for the next stage of detailing.
Final Thoughts
A DIY car decontamination process might seem like extra effort, but the results are absolutely worth it. It takes your car from looking clean to looking professionally detailed. The paint becomes smoother, shinier, and far better prepared for protection.
Once you experience the difference, it becomes a regular part of your car care routine. Whether you are preparing for polishing or simply maintaining your vehicle, decontamination is a step you should never skip.
With the right approach and a bit of patience, you can achieve results at home that rival professional detailing.