
We’ve all been there. You’ve watched hours of YouTube tutorials, spent a small fortune on a brand-new dual-action polisher, stocked up on premium compounds, and finally set aside a dry Saturday to transform your car's paintwork. You hit the bonnet with the machine, wipe away the residue, and step back expecting a mirror finish.
Instead, it’s a hazy, smeared mess. Or worse, you’ve somehow added more micro-scratches than you started with.
Machine polishing is often sold as a magical process, but the reality is that it’s a physical, mechanical skill. You are effectively sanding down a microscopic layer of your car’s clear coat to level out defects. When things go wrong, it’s rarely the machine’s fault. It usually comes down to human error.
Whether you’re a weekend driveway warrior or someone looking to take their first steps into professional detailing, avoiding the most common machine polishing mistakes will save you time, money, and a lot of sheer frustration. Here are the seven biggest traps people fall into, and exactly how you can avoid them.
1. Skipping the Decontamination Stage (The Ultimate Sin)
Let’s get one thing straight right out of the gate: washing your car with a bucket and a wash mitt does not mean your paint is ready for a machine polisher.
When you drive, your car's clear coat acts like a magnet for bonded contaminants. We’re talking about iron fallout from brake dust, microscopic blobs of road tar, tree sap, and industrial fallout. These particles embed themselves into the paint. You can’t always see them, but if you run your hand across a freshly washed bonnet in a plastic sandwich bag, you’ll feel them. It feels like fine sandpaper.
Why It’s a Disaster
If you take a spinning foam or microfiber pad to a panel that hasn't been decontaminated, you are simply ripping those harsh particles out of the clear coat and trapping them in your polishing pad. You’ve just turned your expensive finishing pad into a piece of liquid sandpaper, dragging that grit across the rest of the car at 4,000 orbits per minute. The result is "pig tails" (tiny, curly scratches) and heavy marring.
The Fix
Never skip the chemical and mechanical prep.
-
Chemical: After your contact wash, apply a dedicated iron fallout remover and a tar remover. Let them dissolve the worst of the bonded grit, and rinse thoroughly.
-
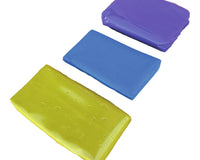
Mechanical: Follow up with a clay bar or a clay mitt using plenty of lubrication. When the paint feels as smooth as wet glass, then you can pick up the polisher.
2. Using Way Too Much Product
It’s human nature. If a few drops of compound remove light swirls, then a massive dollop of the stuff should obliterate deep scratches, right? Absolutely not.
When you buy your first bottle of heavy cut compound, you might be tempted to draw a massive smiley face or a thick spiral of liquid onto the face of the pad.
Why It’s a Disaster
Using too much polish completely ruins the mechanics of how paint correction works. A polishing compound relies on a delicate balance of abrasives and lubrication. If you saturate the pad, a few things happen:
-
Hydroplaning: The pad literally floats on a thick layer of liquid polish, preventing the abrasives from properly biting into the clear coat. You get zero cut.
-
Pad Saturation: The foam becomes heavy and soggy. The dual-action movement is absorbed by the spongy, wet pad rather than transferring the mechanical energy to the paint.
-
The Mess: As soon as you turn the machine on, the excess polish will sling across your windscreen, into your wiper cowls, and all over your driveway. It’s an absolute nightmare to clean up.
The Fix
Prime your pad correctly. For a brand new, dry pad, apply four or five pea-sized drops of compound evenly across the outer edge of the pad. Gently massage it in with your thumbs. For every subsequent section, you only need three tiny, pea-sized drops. Let the pad and the machine do the heavy lifting, not a flooded layer of liquid.
3. Working an Area the Size of a Football Pitch
You’ve got a big car—maybe an estate or a large SUV—and you want to get the job done before Sunday dinner. You apply your polish, turn the machine on, and start walking the polisher from one end of the door all the way to the other, sweeping it around like you’re vacuuming a living room carpet.
Why It’s a Disaster
Compounds are designed to break down. As you work them, the abrasives fracture into smaller and smaller pieces, turning from a heavy cutter into a fine polish, which is what leaves a glossy finish. This only happens if heat and friction are concentrated.
If you spread your compound over an entire door panel, the product will dry out and dust up before the abrasives even have a chance to do their job. You’ll end up with a dull, unfinished look and you won’t have removed any actual scratches.

The Fix
Discipline is key here. Map out an area no larger than 40cm by 40cm (roughly 2 feet by 2 feet) in your mind. Keep the polisher strictly within that imaginary box. Do your overlapping passes (up and down, then side to side) until the polish goes clear or slightly oily, wipe it off with a clean microfiber, and then move on to the next 40cm square. Yes, it takes longer, but it’s the only way to get actual results.
4. Moving the Machine Too Fast (The Race Against Time)
Hand-in-hand with working too large of an area is arm speed. It is incredibly common to see beginners aggressively shoving the polisher back and forth across the paint, scrubbing at it like they’re trying to get dried egg off a frying pan.
Why It’s a Disaster
Paint correction takes time. The pad needs a specific amount of dwell time over every single millimetre of clear coat for the abrasives to level the surface. If you whip the machine left and right at a rapid pace, the pad simply skates over the top of the defects. You might temporarily hide the scratches because the oils in the polish are filling them in, but as soon as you do an alcohol wipe-down, the swirl marks will stare right back at you.
The Fix
Slow down. Seriously, slower than you think. Your arm speed should be roughly one inch per second. It should feel almost painfully slow. Let the weight of the machine rest on the paint, apply just a few pounds of downward pressure (enough to compress the pad slightly, but not enough to stop it spinning), and let it crawl.
5. Working with a Clogged, Dirty Pad
You’re halfway through polishing your car. The machine was cutting brilliantly on the bonnet, but by the time you reach the rear quarter panel, it feels like nothing is happening. The paint isn't clearing up, the machine feels like it’s juddering, and there’s dust flying everywhere.
The culprit? You haven’t cleaned your pad since you started.
Why It’s a Disaster
As you polish, three things accumulate on the face of your pad: spent (broken down) abrasives, the carrying oils from the compound, and the microscopic layer of clear coat you’ve just shaved off the car.
Within just a couple of panels, all of that debris cakes the pores of your foam or microfiber pad solid. The pad becomes hard and glazed over. A clogged pad has zero cutting ability. Instead of correcting the paint, you are now just aggressively rubbing a hardened disc of dead paint and old compound against your car, which causes heat build-up and micro-marring.
The Fix
Clean your pad on the fly. After every single section (or every other section at the very most), take a pad conditioning brush—or even a clean, stiff toothbrush if you’re in a pinch—hold the polisher over a bin, turn it on to a low speed, and run the bristles across the spinning pad to eject the dust and spent polish.
Furthermore, you should swap to a completely fresh pad after every 2 or 3 large panels. You cannot machine polish an entire car with just one pad. Professional detailers will often use 4 to 6 of the exact same cutting pads on a single vehicle to ensure maximum cut and a clean finish.
6. Refusing to Tape Up Plastics and Rubber
Taping up a car is incredibly boring. Spending twenty minutes walking around a vehicle with a roll of masking tape before you even switch on the machine feels like a massive waste of time. It’s tempting to just skip it and tell yourself, "I’ll just be careful near the edges."
Why It’s a Disaster
You won't be careful enough. When a foam pad spinning at high speeds hits textured black plastic trim, rubber window seals, or washer jets, it acts like an eraser. It will instantly burn or scuff the rubber, leaving permanent white friction marks that are virtually impossible to remove.
Even if you don't burn the trim, the white polishing compound will become embedded in the porous black plastic. You will spend hours with an old toothbrush and all-purpose cleaner trying to scrub white chalky lines out of your scuttle panel, completely ruining the joy of having freshly polished paint.
The Fix
Bite the bullet and tape up. Use a low-tack, automotive-grade masking tape (don't use cheap DIY store decorators tape, as it can leave a sticky residue behind). Tape off window rubbers, unpainted plastic wheel arches, badges, and panel gaps where dust might accumulate. It takes 15 minutes and will save you three hours of miserable clean-up later.
7. Chasing 100% Correction on a Daily Driver (Ego Over Logic)
This is perhaps the most dangerous mistake, and it’s one that even intermediate detailers make. You’re working on a door panel, you’ve done your heavy cutting stage, and 90% of the swirls are gone. But right in the middle of the door, there’s one deep, random scratch that just won't budge. So, you hit it again. And again. Applying more pressure, trying to chase perfection.
Why It’s a Disaster
Modern factory clear coat is shockingly thin. To put it into perspective, a standard sheet of printer paper is about 100 microns thick. The entire paint system on your car (primer, base colour, and clear coat) might be 120 microns. The clear coat—the only part you can safely polish—is usually only 30 to 50 microns thick. That is thinner than a Post-It note.
If a scratch has penetrated deeply into that clear coat, and you keep aggressively compounding it trying to make it vanish, you run a very high risk of "striking through"—burning right past the clear coat and exposing the dull base colour underneath. Once you strike through, there is no polishing it out. The panel has to go to a bodyshop to be resprayed.
The Fix
Know when to walk away. If you are detailing a daily driven car that sees supermarket car parks and motorway miles, chasing a flawless 100% correction is a fool’s errand. You are removing vital UV protection and clear coat thickness for a scratch that will probably be replaced by a new one next week.
Aim for an 80% to 90% enhancement. Round off the harsh edges of those deep scratches so they don't catch the light, bring out the high gloss in the rest of the panel, and leave as much clear coat on the car as possible for future polishing. Preservation is always better than perfection.
Final Thoughts
Machine polishing doesn't have to be intimidating. The machines themselves, particularly modern dual-action polishers, are safer and more effective than ever before. But they are only as good as the person holding them.
By taking the time to decontaminate your paint, managing your compound usage, cleaning your pads regularly, and respecting the limits of your clear coat, you immediately elevate yourself above the vast majority of beginners.
Remember, it’s not about rushing to the finish line; it’s about methodical, controlled technique. Get your setup right, put some good music on in the garage, and let the machine do the hard work. If you're looking to upgrade your setup or need to stock up on fresh pads and compounds before your next detail, check out the professional-grade detailing range at Killer Brands.