
Few things are more satisfying than seeing your car shine as if it just rolled out of the showroom. If you're ready to elevate your car's appearance, machine polishing is the way to go. Whether you're a seasoned enthusiast or a newcomer to the world of car detailing, this guide will walk you through the steps to achieve that head-turning, mirror-like finish.
Step 1: Gather Your Tools and Supplies
Before diving into machine polishing, ensure you have the necessary tools and supplies ready:
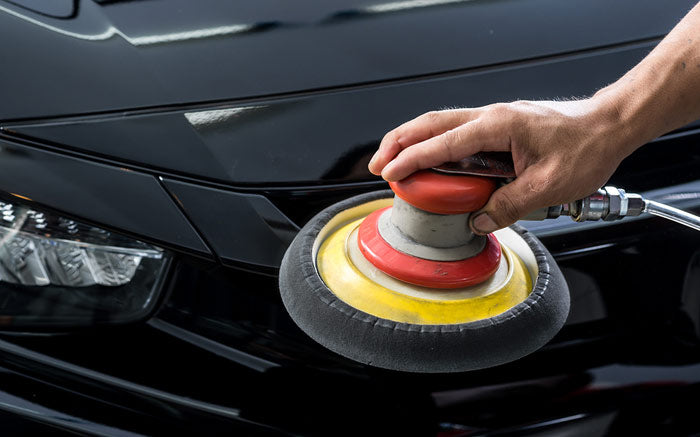
- Dual-Action Polisher: Invest in a good-quality dual-action (DA) polisher. It's user-friendly and less likely to cause damage compared to rotary polishers.
- Polishing Pads: Depending on the severity of imperfections, you'll need different foam or microfiber polishing pads. Coarser pads are for heavy correction, while finer ones are for polishing.
- Compound and Polish: Select an appropriate compound for heavy correction and a fine polish for refining the finish.
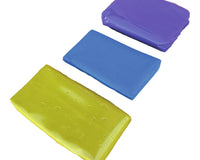
- Clay Bar Kit: This helps remove embedded contaminants from the paint surface.
- Microfiber Towels: Have a stack of clean, high-quality microfiber towels for wiping off polish and buffing.
- Painter's Tape: To protect sensitive areas like rubber trim or plastic.
Step 2: Wash and Decontaminate
Before embarking on the machine polishing journey, it's essential to begin with a clean canvas. Start by giving your car a thorough wash. Use a high-quality car wash soap, a bucket, and a soft wash mitt to ensure a gentle yet effective cleaning process. Pay extra attention to areas prone to dirt build up, like the lower panels and wheel arches.
After the initial wash, consider taking it a step further with a clay bar kit. The clay bar helps remove embedded contaminants from the paint surface that regular washing can't eliminate. To use it, simply lubricate the best clay bar with a quick detailing spray or a clay lubricant and glide it gently over the surface, feeling for any rough spots. If you encounter resistance, the clay bar is doing its job by lifting contaminants from the paint. Wipe the area with a clean microfiber towel, and repeat the process until the entire car feels smooth to the touch.
Step 3: Mask Off Sensitive Areas
Machine polishing can be a messy process, and to avoid inadvertently applying polish or compound to areas where you don't want it, such as rubber trim, plastic, or sensitive emblems, use painter's tape to mask off these sections. This meticulous step ensures that only the intended surfaces receive the treatment, simplifying cleanup later on.
Step 4: Test a Small Area
Machine polishing can yield different results depending on your car's paint type and the combination of pads and compounds you use. To avoid potential mishaps on your entire vehicle, it's wise to perform a test spot on a small, inconspicuous area first. This practice area serves as a canvas for experimentation, helping you determine the most effective combination of pad, compound, and machine speed for your specific paint type. Adjust your technique based on the results until you achieve the desired level of correction and shine.
Step 5: Apply Compound
With your testing phase complete and your machine polishing parameters established, it's time to apply the compound to the sections of your car that require correction. A small amount of compound is sufficient; a little goes a long way. Dab the best car compound directly onto the polishing pad to ensure even distribution. Start with a lower machine speed setting to avoid any initial splattering, gradually increasing it as you work the compound into the paint.
Using the dual-action polisher, make overlapping passes while maintaining a flat orientation of the machine against the surface. This prevents swirl marks and ensures even coverage of the compound. The compound's abrasive properties work to remove surface imperfections, such as swirls, scratches, and oxidation, revealing the underlying vibrant paint.
Step 6: Work in Sections
Dividing your car into manageable sections is crucial for a systematic and effective machine polishing process. This approach ensures that you give equal attention to every part of your vehicle's exterior. Here's how to implement this step:
- Quarter Panels: Start with one quarter panel, which typically consists of one side of your car's front or rear. Use your machine polisher with the selected pad and compound. Work slowly and methodically, making overlapping passes. Cover the entire quarter panel before moving on to the next section.
- Hood and Roof: After completing a quarter panel, you can move on to the hood and roof. Again, divide these larger surfaces into smaller sections to ensure thorough coverage. Continue using the same technique, maintaining a consistent machine speed and pressure.
- Doors and Trunk: The doors and trunk lid should be approached similarly. Break them down into manageable sections and follow the same procedure. Ensure that you maintain an even level of correction and polishing across all areas.
By working in sections, you not only ensure comprehensive coverage but also prevent overworking the paint, which can lead to uneven results. This methodical approach is especially important when dealing with severe imperfections or when polishing dark-coloured vehicles, where any inconsistencies can be more noticeable.
Step 7: Assess Your Progress
Regularly pause to assess your progress during the machine polishing process. This evaluation is essential for achieving the desired level of correction and preventing over-correction. Here's what to do:
- Wipe Off Residue: After polishing a section, use a clean, high-quality microfiber towel to wipe off the residue left by the compound or polish. This reveals the true condition of the paint beneath.
- Inspect the Finish: Examine the paint closely under various lighting conditions, such as natural sunlight or LED lighting. Look for any remaining swirls, scratches, or imperfections. Depending on your observations, you may need to repeat the polishing process with a finer pad and polish or continue with the next section.
- Keep a Record: It can be helpful to keep a record of your progress. Note any specific areas that required extra attention or unique combinations of products and techniques that yielded the best results. This record will be invaluable for future detailing sessions.
Step 8: Remove Tape and Clean Up
After completing the machine polishing process, carefully remove the painter's tape from the protected areas. Be gentle to avoid accidentally pulling off paint or leaving behind adhesive residue. Once the tape is removed, take a moment to clean up any remaining compound or polish residue. A detailing spray or isopropyl alcohol on a clean microfiber towel can help remove any lingering traces.
By following these steps, you ensure that your machine polishing process is thorough, systematic, and leaves your car's paint surface looking its best. Regular assessments and a methodical approach will result in a finish that shines brilliantly and is free from swirl marks and imperfections.
Step 9: Apply Wax or Sealant
The final stages of machine polishing involve not only correcting imperfections but also protecting your car's newly rejuvenated paint finish. Applying best wax or a best paint sealant not only enhances the shine but also provides a protective barrier against environmental elements, UV rays, and contaminants. Here's how to complete this essential step:
- Select Your Product: Choose a high-quality car wax or paint sealant that suits your preferences and needs. Waxes often provide a warm, deep shine, while sealants offer longer-lasting protection. Some products combine the benefits of both.
- Prep the Surface: Ensure that the paint surface is entirely free of any compound or polish residue. Use a clean microfiber towel or detailing spray to remove any remaining traces.
- Application: Follow the instructions for the selected product. Typically, you'll apply a small amount of wax or sealant to an applicator pad or directly onto the paint surface. Work in small, manageable sections to ensure even coverage. Spread it evenly on the surface.
- Allow to Cure: After applying the wax or sealant, allow it to cure for the recommended time specified by the product's instructions. This curing period allows the protective layer to bond with the paint surface effectively.
- Buffing: Once the curing time has elapsed, use a clean, dry microfiber towel to buff off the residue. Buff gently and in a circular motion to reveal the lustrous shine beneath.
- Repeat as Needed: Depending on your chosen product, you may need to apply multiple layers for enhanced protection and longevity. Follow the manufacturer's recommendations for layering and curing times.
The application of wax or sealant not only adds depth and gloss to your car's finish but also safeguards the paint from the elements, ensuring your hard work in machine polishing lasts longer.
Machine Polishing a Car - Conclusion
Machine polishing is an art that requires practice and patience. But with the right tools, techniques, and a little elbow grease, you can achieve professional-level results and make your car look like it just rolled off the showroom floor. So, roll up your sleeves and get ready to witness your vehicle's transformation into a gleaming work of art!