
We've all been there – that unfortunate moment when a coffee cup topples over, a ketchup packet explodes, or a little one's ice cream cone meets an untimely demise on your car seat. Car seat stains are an unwelcome sight, but with the right techniques, you can bid them farewell and restore your seats to their pristine condition. In this guide, we'll walk you through the process of removing stains from your car seat, step by step.
Step 1: Gather Your Supplies
Before you dive into the stain removal process, collect your cleaning supplies. You'll typically need:
- A clean cloth or paper towels
- A bucket of warm water
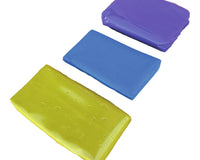
- A mild liquid detergent or upholstery cleaner
- A soft-bristle brush or toothbrush
- White vinegar or rubbing alcohol
- Baking soda (for odour control)
- Leather conditioner (if you have leather seats)
Step 2: Blot, Don't Rub
When confronting a fresh stain on your car seat, your initial reaction can significantly impact the effectiveness of your stain removal efforts. Rather than hastily reaching for a cloth and vigorously rubbing at the stain, take a moment to understand why blotting is the preferred technique.
Blotting involves using a gentle, repetitive pressing motion with a clean cloth or absorbent paper towel to lift the stain from the seat's surface. The rationale behind this approach is to avoid spreading the stain further into the fabric or leather. When you rub a stain, you run the risk of pushing the staining substance deeper into the material's fibres, making it more challenging to remove.
By contrast, blotting minimizes the potential for further damage. As you press the cloth onto the stain, it acts like a sponge, absorbing the liquid without spreading it around. This method is especially effective for fresh liquid stains like coffee, soda, or juice. The goal is to soak up as much of the liquid as possible before proceeding with the stain removal process. So, remember, gentle blotting, not vigorous rubbing, is your go-to technique for tackling fresh stains on your car seats.
Step 3: Know Your Seat Material
Understanding the material of your car seats is paramount when it comes to stain removal. Different seat materials require different cleaning approaches to prevent damage or discoloration. Let's delve deeper into the specific considerations for various seat materials:
Fabric Seats: Fabric seats are versatile and commonly found in vehicles. They can generally withstand a range of cleaning solutions. However, it's essential to opt for a mild detergent or upholstery cleaner specifically formulated for automotive use. These specialized cleaners are designed to effectively break down stains without compromising the fabric's integrity.
Leather Seats: Leather seats exude elegance and luxury but necessitate special care. Leather is prone to drying out and developing cracks if not properly maintained. Therefore, when dealing with leather, always use a leather cleaner specifically designed for automotive applications.
Vinyl and Suede Seats: While less common, some vehicles come equipped with vinyl or suede seats. Vinyl seats can be relatively easy to clean with a mild detergent and water solution. However, suede seats are delicate and may require professional cleaning to prevent damage or discoloration.
Seat Covers: If you've opted for seat covers, it's equally important to understand the material of the covers themselves. Some seat covers are machine washable, simplifying the cleaning process, while others may necessitate specialized cleaning methods.
Step 4: Test in an Inconspicuous Area
Before embarking on the stain removal process, it's wise to take a cautious approach by conducting a small test in an inconspicuous area of your car seat. This practice serves as a safeguard against unexpected damage or discoloration to your vehicle's interior.
Here's why this step is crucial:
Product Compatibility: Different cleaning products and solutions can interact with seat materials in unpredictable ways. By testing in a hidden area, you can confirm that the chosen cleaning agent is compatible with your specific car seat material.
Colourfastness: The dye used in your car seat material may not be colourfast, meaning it could fade or bleed when exposed to certain cleaning agents. Testing in an inconspicuous spot allows you to check for any undesirable colour changes.
Texture and Finish: Some cleaning agents may alter the texture or finish of your seat material. Testing in a hidden area lets you assess whether the product affects the seat's feel or appearance.
Choose a spot on the car seat that is typically hidden from view, such as under the seat or along the sides. Apply a small amount of the cleaning solution or cleaner you intend to use. Allow the solution to sit for a few minutes, adhering to the product's recommended contact time. Observe for any adverse reactions, such as changes in colour, texture, or finish. If the test reveals no unwanted effects, you can proceed with confidence, knowing that your chosen cleaning method is safe for your car seats.
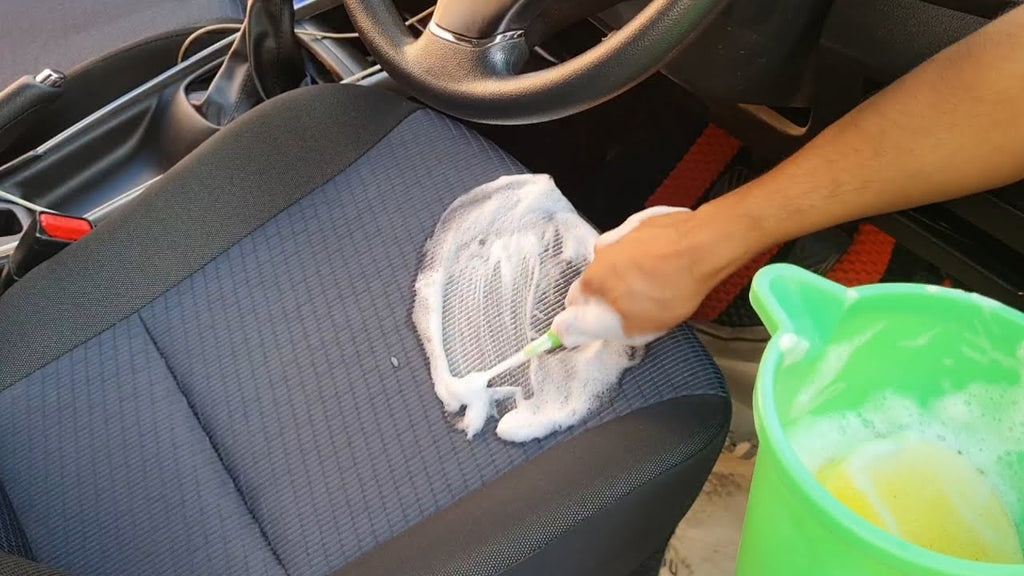
Step 5: Cleaning the Stain
Once you've successfully blotted the stain, it's time to move on to the actual stain removal process. This step is where you'll use a cleaning solution to break down and lift the remaining stain from your car seat. Here's how to do it effectively:
- Prepare the Cleaning Solution: Begin by mixing a few drops of a mild liquid detergent or an upholstery cleaner suitable for automotive use with warm water. The warm water helps activate the cleaning agents in the solution, making it more effective at tackling the stain.
- Apply the Solution: Dip a clean cloth into the prepared solution, ensuring it's not overly soaked, and gently wring out any excess liquid. The cloth should be damp but not dripping. Then, proceed to gently blot the stained area with the cloth. This action helps transfer the cleaning solution to the stain.
- Work the Solution in: To break down the stain effectively, use a soft-bristle brush or a toothbrush. With gentle circular motions, work the solution into the stain. This helps to lift the stain particles from the seat material. Continue this process until you notice the stain gradually fading.
- Blotting and Checking: Periodically, stop brushing and blot the area with a clean, dry cloth to check the progress. This step allows you to assess whether the stain is responding to the treatment. Be patient; some stains may require multiple rounds of treatment.
Step 6: Stubborn Stains
For those particularly stubborn stains that seem unyielding to the standard cleaning solution, you can employ a stronger approach. Mix equal parts white vinegar and water or use rubbing alcohol. Apply this solution to a clean cloth and gently blot the stubborn stain. However, exercise caution with these stronger solutions, especially when dealing with leather seats, as they may potentially harm the finish. Always test the solution in an inconspicuous area first.
Step 7: Odour Control with Baking Soda
In some cases, a stain may leave behind an unpleasant odour, even after successful removal. To address this issue, utilize baking soda, a household staple known for its odour-absorbing properties. Sprinkle a generous amount of baking soda over the previously stained area. Allow it to sit for several hours or even overnight. Baking soda will naturally absorb any lingering odours, leaving your car seat smelling fresh. After the baking soda has had sufficient time to work its magic, use a vacuum cleaner with an upholstery attachment to thoroughly vacuum up the baking soda. This step ensures that no residue is left behind.
Step 8: Rinse and Dry
After you've successfully treated the stain and removed any odour, it's crucial to complete the process by rinsing and drying the treated area. Here's how to wrap up this critical step:
- Rinse with Clean Water: Use a clean, damp cloth to gently blot the area and rinse away any remaining cleaning solution. This step ensures that no residue is left on the seat, which could attract dirt and potentially cause further staining.
- Remove Excess Moisture: After rinsing, blot the area again with a clean, dry cloth to remove excess moisture. This step promotes quicker drying and prevents watermarks or streaks.
- Air Dry: To conclude the process, let the car seat air dry naturally. Avoid using external heat sources like a hairdryer or heater, as they can harm the fabric or leather. Allowing the seat to air dry ensures a uniform drying process and maintains the seat's appearance.
By following these steps diligently, you can effectively remove stains from your car seat, leaving it looking fresh and clean. Whether your car seats are made of fabric, leather, or other materials, this method can help restore their pristine condition.
Step 9: Prevention
Preventing stains is key to keeping your car seats in top condition. Consider using seat covers, especially if you have young passengers or transport spill-prone items. Encourage caution with food and drinks in the car, using spill-proof containers and designating eating areas. Regularly vacuum your seats to prevent dirt build-up, and be prepared to address spills promptly with a car cleaning kit. Invest in stain-resistant products and consider using waterproof protectors under child car seats. Make car seat maintenance a routine, educate passengers about stain prevention, shield your seats from prolonged sunlight exposure, and securely fasten cargo to prevent spills during transit. These preventive measures will help keep your car seats looking clean and well-maintained.
Car Seats Stain Removal - Final words
In conclusion, removing stains from car seats may seem like a daunting task, but armed with these steps and a bit of patience, you can restore your seats to their former glory. Act swiftly, use the appropriate cleaning supplies, and know your seat material. With these tips, you'll be well-prepared to handle accidental spills and keep your car interior looking fresh and clean. Happy driving!