
There is a very specific, sinking feeling that every car detailer—whether a weekend enthusiast or a seasoned professional—knows all too well. You are halfway through an interior deep clean, tackling a footwell absolutely smothered in crushed biscuits, dried mud, and woven-in pet hair. You press your crevice tool firmly into the carpet, expecting to see a satisfying, clean stripe emerge.
Instead, the machine gives a high-pitched, strained whine, and the dirt barely moves.
You haven't lost your technique, and the motor hasn't suddenly degraded. You are simply experiencing the inevitable consequence of poor equipment maintenance. A car vacuum cleaner is, fundamentally, an air pump. It relies entirely on the unrestricted flow of air to generate the cubic feet per minute (CFM) and water lift necessary to drag heavy debris out of dense automotive carpets. When that airflow is restricted, suction dies, your workflow grinds to a halt, and your machine’s motor is put under immense, potentially fatal, strain.
If you want professional results, you must treat your detailing equipment with professional respect. In this comprehensive guide, we are going to break down the precise mechanics of how to maintain and clean your car vacuum for maximum suction, ensuring your machine pulls just as hard on its hundredth detail as it did on its first.
The Anatomy of Suction Loss: Understanding the Enemy
Before you start ripping your vacuum apart, you need to understand exactly why it is losing power. A vacuum motor works by spinning a fan at incredibly high speeds, creating a drop in air pressure inside the canister. Atmospheric pressure then rushes in through the hose to fill that void, carrying dirt and debris with it.
Crucially, the air that enters the vacuum must also be able to exit the vacuum. The air flows past the dirt, through the filter, over the motor (to cool it), and out the exhaust port.
Air takes the path of least resistance. If the filter is clogged, the bag is full, or a seal is broken, the machine physically cannot move enough air to create suction at the end of the hose. Furthermore, because most detailing vacuums rely on this constant stream of passing air to cool their internal components, a blocked vacuum will rapidly overheat. This triggers thermal safety cutouts and, over time, will permanently fry the motor's internal windings.
Restoring suction is not about buying a bigger motor; it is about eliminating restrictions.
Step 1: The Heart of the Machine – Filter Maintenance
The single most common cause of suction loss in any car valeting scenario is a clogged filter. In a detailing environment, your vacuum is picking up incredibly fine particulate matter: dry mud dust, pollen, human skin cells, and the chalky residue of broken-down interior plastics. This fine dust instantly cakes the microscopic pores of your vacuum's filter.
The Knock-and-Tap Method (During a Detail)
You cannot wait until the end of the month to clean your filter. During a heavy interior detail—especially when dealing with plaster dust, sand, or dog hair—you should clear the filter multiple times. Remove the motor head, take the filter outside, and firmly tap the plastic or rubber rim against a solid object like a brick wall or the edge of a wheelie bin. Do not hit the delicate pleats of the filter itself. You will be astounded by the sheer volume of fine, flour-like dust that drops out. This ten-second process will immediately restore 50% of your lost suction.
The Deep Clean Wash (Monthly)
If your vacuum utilises a washable foam or heavy-duty synthetic pleated filter, it requires a thorough wet clean every few weeks.
-
Remove heavy debris: Tap the filter out completely to remove dry dust.
-
Rinse from the inside out: Run lukewarm water through the inside of the filter, pushing the dirt back out the way it came in. If you run water on the outside first, you will simply drive the embedded dirt deeper into the filter media.
-
Use mild detergent: For greasy residues (common if you vacuum up spilled interior dressings or food grease), use a very mild liquid soap. Agitate gently with your fingers, but never use a stiff brush on paper or synthetic pleats, as this will tear the fibres and ruin the filtration.
-
The 24-Hour Rule: This is critical. The filter must be absolutely, 100% bone dry before it goes back into the machine. If you install a damp filter and turn the vacuum on, the moisture will be sucked directly into the motor housing, causing catastrophic electrical shorts and rust. Furthermore, damp pleats will instantly turn the next batch of dust into a thick, impenetrable layer of mud. Leave the filter in a warm airing cupboard or direct sunlight for at least 24 to 48 hours.
Pro Tip: Always keep a spare, dry filter in your detailing kit. When one gets dirty or is drying after a wash, you can simply swap it out and keep working without a drop in performance.
Step 2: Mastering Bagged Systems (Featuring the MetroVac Vac n Blo)
Many modern detailers assume bagless systems are superior because you don't have to buy replacement bags. However, in professional environments, bagged systems often provide significantly better long-term suction and motor protection. The bag acts as a massive primary filter, trapping 99% of the debris before it ever reaches the secondary motor filter.
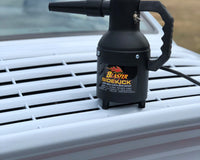
If you want to look at the gold standard of professional, built-to-last equipment, look no further than the MetroVac Vac n Blo 500 VM12500. This machine is an absolute titan in the detailing world, constructed entirely from steel in the USA, and it relies heavily on a dedicated bag and filter system to protect its aggressive 4.0 Peak HP twin-fan motor.
Maintaining the MetroVac VM12500 for Peak Performance
The MetroVac Vac n Blo is unique because it serves a dual purpose: it is both a devastatingly powerful interior vacuum and a forced-air blower used to chase standing water out of panel gaps, wing mirrors, and alloy wheels after a wash. Because it blows air directly onto your freshly washed paintwork, maintaining its internal cleanliness is absolutely paramount. If the internals are dirty, you will end up blasting abrasive dust straight into your pristine clear coat.
To keep a machine like the MetroVac VM12500 operating at maximum capacity, follow these specific protocols:
-
Respect the Paper Bag: The MetroVac utilises high-efficiency disposable paper bags. Do not attempt to empty and reuse these bags. As the paper bag fills, the microscopic pores in the paper become permanently blocked by fine dust. Even if you shake all the heavy sand and gravel out of the bag, those pores remain blocked, and the vacuum will struggle to breathe. Change the disposable paper bag the moment it feels firm or reaches three-quarters full. For the sake of a few pounds, a fresh bag instantly returns the machine to factory suction levels.
-
The Cloth Permanent Filter: Behind the paper bag sits a permanent cloth bag. This is your secondary line of defence. Every time you change the paper bag, remove this cloth filter and shake it out vigorously. Every few months, this cloth bag should be hand-washed in warm soapy water to remove embedded greases and fine silts, then left to air dry completely.
-
The Foam Motor Shield: Right in front of the MetroVac's twin-fan motor is a small foam filter pad. This is the final barrier. If you see dust accumulating heavily here, it means you have either torn a paper bag or your cloth filter is compromised. Wash this foam pad in warm water and let it dry. Keeping this foam clean is what guarantees the 4.0 HP motor won't overheat and burn out during a long detailing session.
Because the MetroVac is encased in solid steel, it creates a perfectly sealed vacuum chamber. Ensuring these three filtration layers (paper bag, cloth filter, foam pad) are clean is the only maintenance the motor will ever require to keep generating its staggering water-lift capabilities.

Step 3: Clearing the Arteries – Hose and Attachment Care
You have a brand new bag, a washed filter, and a screaming motor, yet the suction at the end of the nozzle is still pathetic. The culprit is almost certainly a blockage in the hose or the attachments.
In car valeting, we vacuum up bizarre, awkwardly shaped items: sweet wrappers, thick clumps of damp leaves, rigid plastic bottle caps, and receipts. These items frequently turn sideways and lodge inside the ribbed ridges of the vacuum hose. Once a blockage starts, pet hair and dust quickly build up behind it, creating a solid plug.
The Broomstick Method for Blocked Hoses
Never try to clear a blocked vacuum hose by connecting it to the exhaust/blower port to "blow it out." If the blockage is solid, the backpressure can damage the machine. Instead, use physical force. Detach the hose from the vacuum canister. Take a standard wooden broom handle (or a long piece of rigid PVC piping) and gently push it through the hose from the handle end towards the machine end. You will physically push the compacted wad of debris out onto the floor.
Washing the Hose
Over months of use, the internal ridges of your vacuum hose will become coated in a sticky layer of spilled sugary drinks, damp dog hair, and mud. This internal friction actually slows down the airflow. Every six months, detach the hose, take it to a large sink or outdoor tap, and run hot, soapy water completely through it. Agitate it by lifting alternate ends to let the water slosh back and forth. Rinse it clean and hang it vertically over a fence or door for a full day so every drop of water drains out before you reattach it to your machine.
Cleaning Crevice Tools and Upholstery Brushes
Your attachments are the primary point of contact with the vehicle's interior.
-
Crevice Tools: Inspect the narrow opening. They frequently get jammed with small stones or coins that become wedged sideways, severely restricting airflow. Pry them out with a long screwdriver.
-
Dusting Brushes: The soft bristles on your dashboard dusting brushes act like a magnet for lint and pet hair. If the bristles are matted together with dirt, they cannot sweep dust out of air vents properly. Comb the bristles out with a stiff wire brush or a standard hair comb, and wash the attachment in warm soapy water to remove built-up interior dressing oils.
Step 4: Inspecting Seals, Gaskets, and O-Rings
If your filters are spotless and your hose is clear, but suction is still weak, you have an air leak.
Remember, air takes the path of least resistance. The vacuum motor is desperately trying to pull air through the tiny opening of your crevice tool. If there is a cracked rubber gasket between the motor head and the dirt canister, the motor will simply suck air through that crack instead of from the end of the hose. You lose all your static pressure.
The Leak Test
Turn your vacuum on and block the end of the hose completely with the palm of your hand. The motor should instantly pitch up into a high, strained whine. Now, run your other hand around the seams of the vacuum—where the lid meets the bucket, where the hose plugs into the port, and around any exhaust vents.
If you feel air pulling inward against your fingers, or if the high-pitched whine drops when you press on a certain part of the plastic housing, you have found a compromised seal.
-
Rubber Gaskets: Check the large rubber O-ring that sits under the motor head. Over time, grit can get trapped under this seal, preventing it from seating flush. Wipe the gasket down with a damp microfiber cloth and apply a tiny smear of silicone grease to keep the rubber supple and prevent it from perishing.
-
Hose Ports: The friction-fit port where your hose connects to the tub often wears loose over time due to the constant pulling and dragging of the machine by its hose. If it is loose, air is leaking. You can temporarily fix this by wrapping a single layer of electrical tape around the male end of the hose connector to create a tighter, airtight friction fit.
Step 5: Managing Moisture and Odours
A car vacuum is frequently subjected to damp environments. You might be vacuuming floor mats that are still wet from a winter snowstorm, or extracting dampness after using an upholstery shampoo.
If you leave damp organic material (like mud, food crumbs, and dog hair) sitting in the dark, warm canister of a vacuum cleaner, bacteria will multiply exponentially. The next time you turn the machine on, the exhaust will blast the smell of a wet, rotting dog straight into the confined cabin of the car you are trying to detail, completely ruining your hard work.
Banishing the Stench
-
Empty Promptly: Never leave damp debris sitting in the tub overnight. Empty the bin at the end of every working day.
-
Disinfect the Tub: Once a month, wipe out the inside of the plastic or steel tub with a strong antibacterial all-purpose cleaner (APC) or a diluted bleach solution.
-
Scented Beads (The Professional Trick): If you are running a bagged system like the MetroVac VM12500, a fantastic detailing trick is to suck up a small handful of scented laundry booster beads (or spray a dedicated automotive air freshener onto a piece of kitchen roll and vacuum it up). These sit inside the bag, and as the air flows over them, the vacuum's exhaust will actively deodorise your working environment rather than polluting it.
The Professional Valeter’s Vacuum Maintenance Schedule
To ensure you never suffer a catastrophic loss of suction in the middle of a job, integrate this schedule into your detailing routine:
After Every Detail:
-
Empty the main dustbin or check the fill level of the paper bag.
-
Remove heavy debris (sweet wrappers, large leaves) from the tub.
-
Pull matted hair off the bristles of your upholstery attachments.
Weekly Routine:
-
Take the primary filter out and tap it vigorously against a hard surface to release the caked-on fine dust.
-
Wipe down the exterior of the machine to maintain a professional appearance for your clients.
Monthly Deep Clean:
-
Wash foam or synthetic filters under running water (ensure 48 hours of drying time).
-
Check the hose for partial blockages using the broomstick method.
-
Inspect and wipe down all rubber seals and gaskets to prevent air leaks.
Biannually (Every 6 Months):
-
Wash the interior of the corrugated hose with soapy water.
-
Replace standard paper bags even if they aren't completely full, as the pores will be heavily clogged with microscopic silts.
-
Deep clean the permanent cloth secondary filters (if applicable to your system).
Final Thoughts: Look After Your Tools
In the car valeting industry, time is literally money. Spending an extra ten minutes struggling to pull sand out of a carpet because your vacuum is performing at 50% capacity adds up to hours of lost productivity over a month.
Machine maintenance is not a glamorous part of detailing, but it is the foundation of efficiency. By understanding how airflow works, keeping your filters immaculate, banishing hidden blockages, and investing your time into maintaining high-quality, professional-grade equipment like the MetroVac Vac n Blo 500 VM12500, you guarantee that your tools will work just as hard as you do. Treat your vacuum with respect, and it will reward you with years of relentless, unyielding suction.